StarRez Package List
Setting Up the Scanner
To use the scanner, you must enable it in StarRez. At the top left, go to
File > Preferences
Then, on the left, click Barcode/Swipe Scanning, and checkmark Scanning
Enabled in the center. Then Save and Close
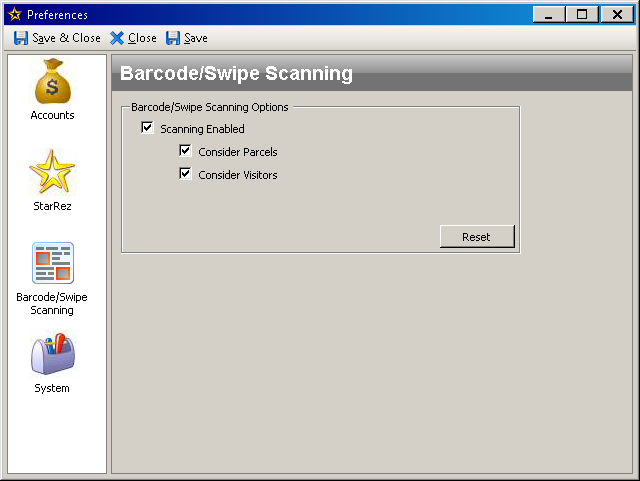
This has to be done for each computer desktop where you use StarRez.
page 31Giving Out Packages
When giving out a package, be sure to see an ID so that you have proof of identity for the person to whom you give the package. Only give the package to the person listed on the address label. An exception can be made if the person has an email giving them permission to take the package. Then you should be able to see the email address of the person whose package it is.
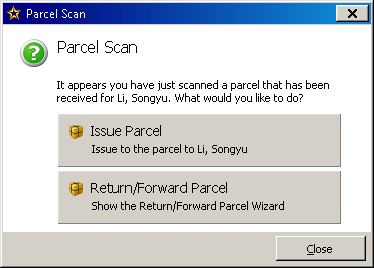
If this is the correct name, click Issue Package, and you are done.
If you see this or if the name in the window above is wrong, you can go to entry manager and manually enter the transaction.
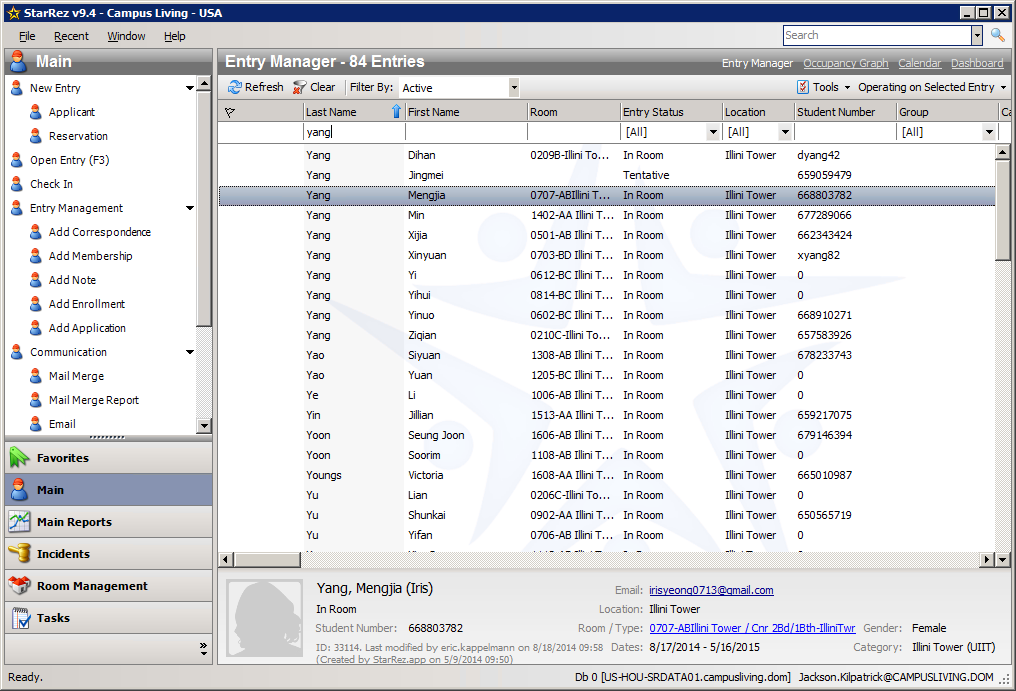
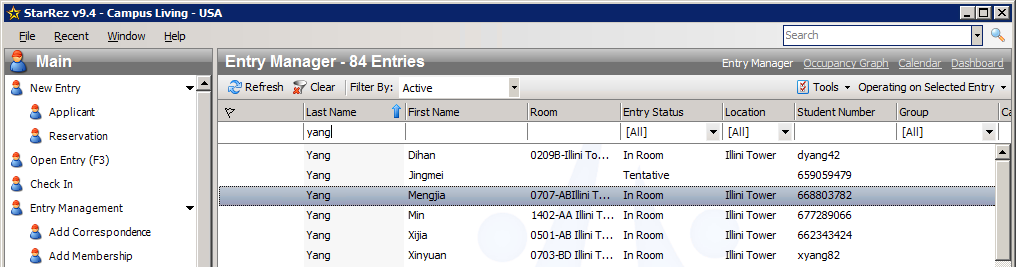
Remember that, if you are in the dashboard, you get out with the links at the top right of the screen. When in the main screen, you can select the Entry Manager by clicking Main at the bottom left. Finally, double click the resident's name.
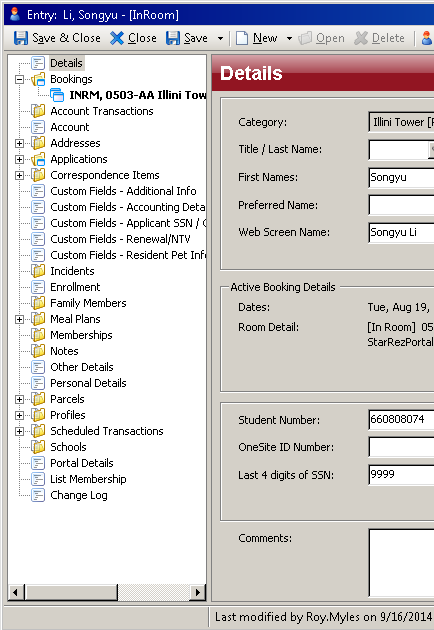
In the resident details screen, click Parcels in the left column.
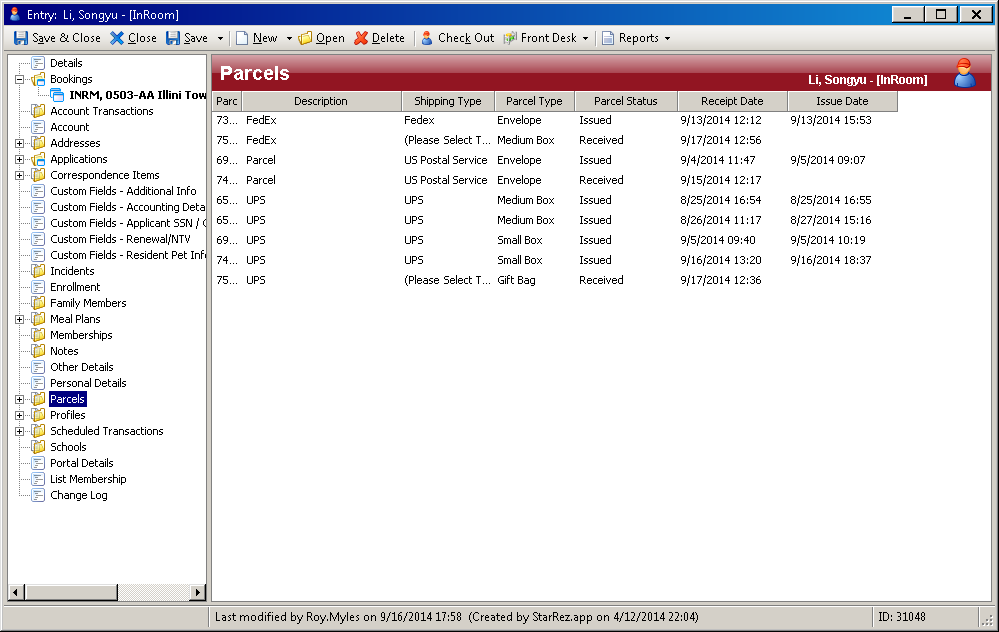
Now, you can see the list of parcels for that resident. In the rightmost column, the issue date is blank on the parcel you are handing out. Double click that parcel.
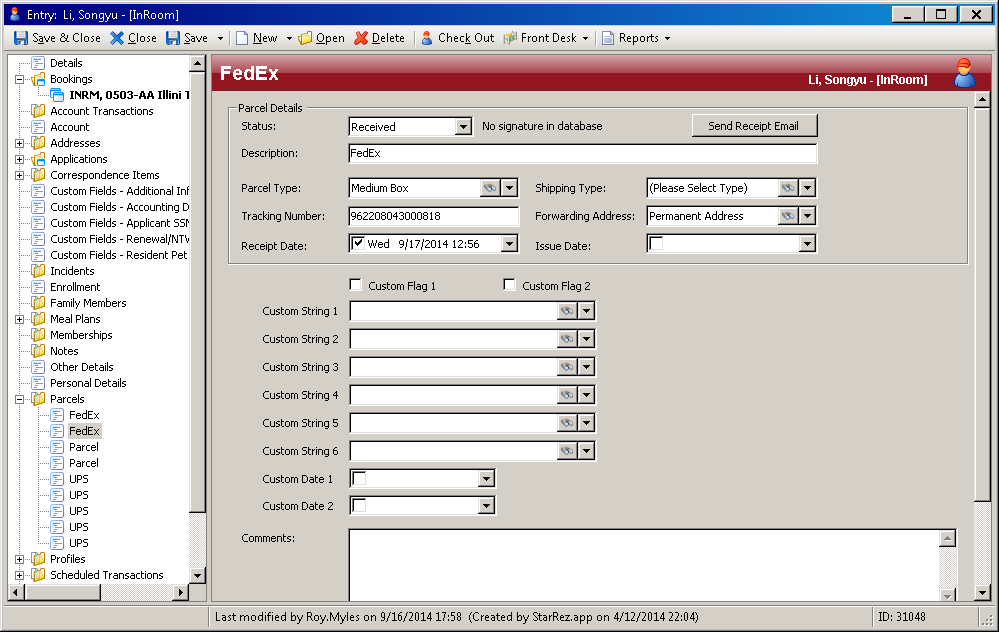
You have two things to change. At the top, change the drop down list from received to issued. Then enter the issue date at the bottom right of that same panel.
As always, Save and Close.
Adding Packages to the List
Part of the night clerk duty is to audit the package list. From the dashboard, you can print out the whole list. There is a tiny printer icon in the top right corner of the panel for the package list.
Go through the list checking to see if the packages are still here. If packages on the list are not here, just enter them as being handed out as in the previous section.
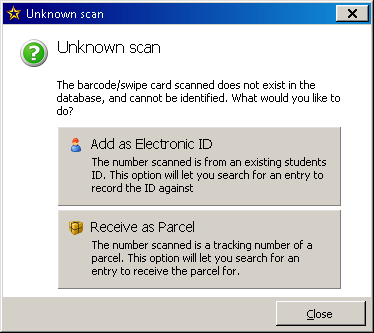
When there are packages that are not on the list, bring them all over to the desk. Scan the tracking number. You should see one of
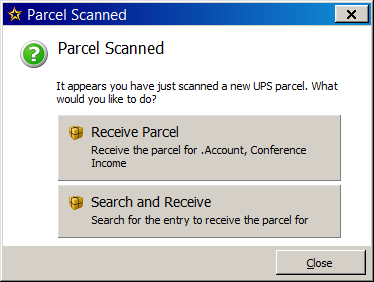
In either case, choose the bottom button "Receive as Parcel" or "Search and Receive" to allow you to find the resident to whom the parcel belongs.
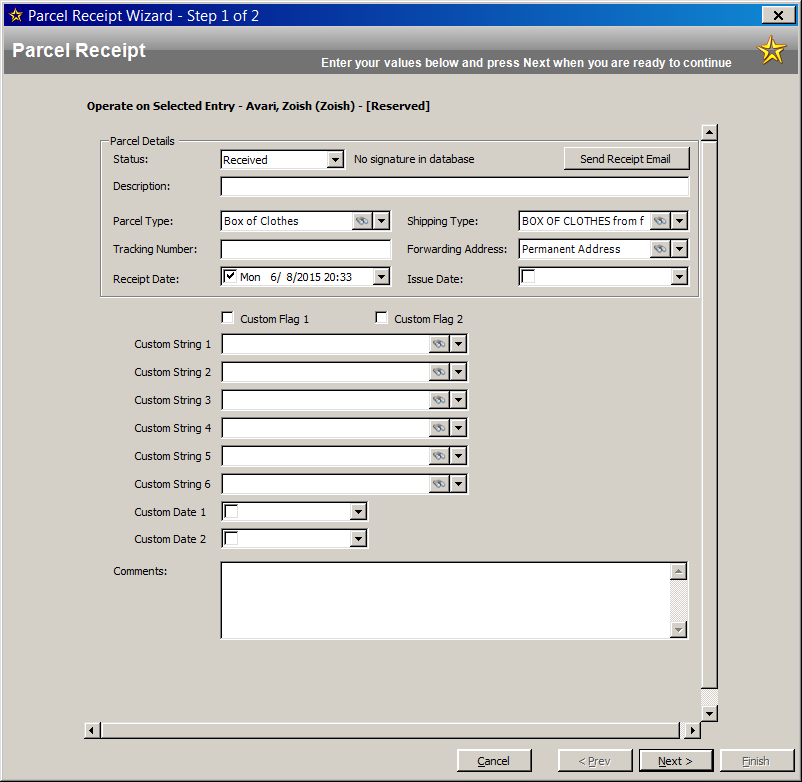
The tracking number will fill in automatically from the scan you just did. The dropdown at the top autofills "received" also. Now just enter Description, Parcel Type, and Shipping Type to help people later if anyone needs these details. Now, before Save and Close, click the button that says Send Receipt Email.
At last, Next and, on the next screen, Finish. I bet you were thinking Save and Close.
← Return to Table of Contents